Materials Needed: Essentials for Pipe Smoking
Embarking on the journey of pipe smoking can be both thrilling and a bit overwhelming. Having been down that road, I understand the importance of having the right materials on hand. This article aims to guide you through the essential materials you’ll need to enhance your pipe smoking experience.
The Pipe
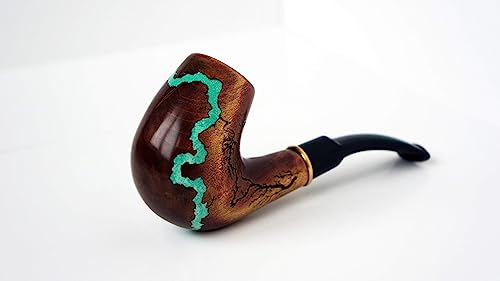
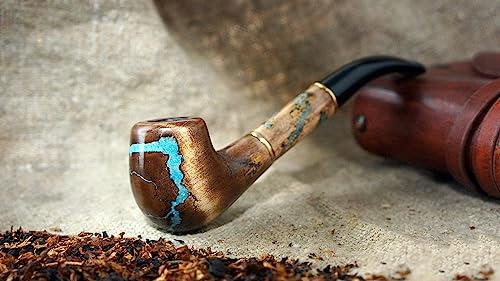
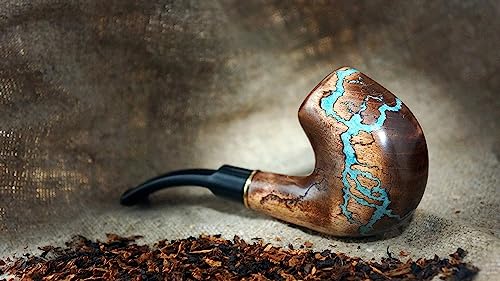
It goes without saying that your first essential is the pipe itself. Pipes come in various materials, shapes, and sizes. As a beginner, I found a briar pipe to be a reliable and affordable choice. Briar, derived from the heath tree, is durable, heat-resistant, and perfect for a satisfying smoke.
Pipe Tobacco
Next up is the tobacco. Pipe tobacco varies in blend, cut, and flavor, each providing a unique smoking experience. For beginners, I recommend starting with an aromatic blend. It’s typically mild, easy to smoke, and comes with a pleasant aroma that won’t be off-putting to those around you.
Pipe Tools
A pipe tool is another essential item that you’ll need. This handy tool usually comes with a tamper for packing the tobacco, a spike for aerating it, and a scoop for cleaning the bowl. A pipe tool was invaluable in my early days of pipe smoking, as it made the process much smoother.
Pipe Cleaners
Keeping your pipe clean is crucial for maintaining its longevity and the quality of your smoke. Pipe cleaners are specially designed to clean the stem and shank of the pipe, removing any residue from previous smokes.
Ignition Source
Finally, you’ll need a source of ignition. Matches or a butane lighter are both suitable for this. I personally prefer using a butane lighter, as it provides a steady flame that’s easy to control.
Optional Accessories
While not essential, a pipe stand and a tobacco pouch can enhance your pipe smoking experience. A pipe stand helps protect your pipe when it’s not in use, and a tobacco pouch is useful for carrying your tobacco on the go.
Choosing the Right Tobacco: A Personal Journey to the Perfect Puff
Entering the world of pipe smoking is an adventure that begins with a critical decision: choosing the right tobacco. With countless varieties available, each offering a distinct flavor profile, the choice can be overwhelming. Fear not, fellow pipe enthusiasts. Allow me to guide you through my personal journey to find the perfect pipe tobacco.
Understanding Types of Pipe Tobacco
One of the first steps to choosing the right tobacco is understanding the different types available.
- Virginia: Often considered the champagne of pipe tobacco, Virginia is a great place to start. It’s naturally sweet and ranges from light to full-bodied depending on its age. My first encounter with Virginia was a revelation, the subtly sweet, grassy flavors making for a delightful smoke.
- Burley: Burley, on the other hand, is a robust, slow-burning tobacco with a nutty flavor. I was introduced to Burley through an old-fashioned blend, and its full-bodied, nutty profile added a new dimension to my smoking experiences.
- Oriental/Turkish: Oriental or Turkish tobaccos are sun-cured, offering complex, spicy, and somewhat tangy flavors. Smoking an Oriental blend for the first time was like discovering a new world of complex, rich flavors.
- Latakia: Used primarily as a blending component, Latakia is fire-cured and delivers a smoky, robust flavor. My first Latakia blend was like a smoky campfire in the best possible way.
- Perique: Rare and precious, Perique is used sparingly in blends for its peppery, fruity flavor. The first time I tasted a Perique blend, I was captivated by its unique, spicy kick.
Experiment with Blends
After understanding different types of tobaccos, it’s time to experiment with blends. Start with a few different varieties, like English blends, Virginia blends, or aromatic blends. I discovered some of my favorite tobaccos by trying a wide range of blends.
The Cut Matters
The cut of the tobacco can affect the smoking experience. Ribbon cuts are easy to pack and ideal for beginners, while flake cuts require a bit more preparation but often provide a richer flavor. My early experiences with the ribbon cut were user-friendly, but as I gained more expertise, the flake cut became my go-to for its depth of flavor.
Strength and Flavor
Lastly, consider the strength and flavor you desire. Are you after a milder smoke or something with a hefty nicotine hit? Are you drawn to the natural flavor of tobacco, or do you prefer a hint of cherry, vanilla, or even chocolate? I’ve journeyed from enjoying mild aromatics to appreciating the robust strength of a good English blend.
Mastering the Art of Pipe Packing: The Three-Layer or “Three Pinch” Method
Pipe smoking is an art. It’s a meditative ritual that requires practice, patience, and understanding of the nuances involved. A crucial aspect of this art is packing your pipe correctly. Having personally navigated the learning curve of pipe packing, I’m here to simplify it for you. Let’s delve into the widely respected Three-Layer or “Three Pinch” Method.
The Gravity Fill
The first step of the Three-Layer method, also known as the gravity fill, is fairly straightforward. You’ll want to hold your pipe in one hand, and your chosen tobacco in the other. Let the tobacco fall into the bowl naturally, without applying any force. This will form your first, loosely packed layer. In my experience, it’s essential to resist the temptation to pack this layer too tightly.
The Firmer Fill
The second step requires a bit more pressure. For this layer, you’ll want to add more tobacco to the bowl, gently pressing it down with your thumb or forefinger until it’s about halfway full. It should feel springy when lightly pressed. My advice is to use moderate pressure, making sure the tobacco is firm but not compacted.
The Final Fill
Finally, you’ll add the third layer, filling the pipe to the top before pressing down once more. This layer should be denser than the previous two but still allow for an easy draw. I learned through trial and error that the key here is balance – too loose and the pipe may burn hot and fast; too tight and it may be difficult to draw and keep lit.
Testing the Draw
Once you’ve completed the three layers, it’s important to test the draw by taking a few puffs as if you were smoking. You’re looking for a smooth, easy draw with a slight resistance. Early in my pipe smoking journey, I’d sometimes find the draw too tight, which usually meant I’d packed the tobacco too densely and needed to start over.
Lighting the Pipe
With the pipe packed, you’re now ready to light it. I prefer using matches or a butane pipe lighter, and it’s generally a two-step process. First, the “charring light” to get the tobacco lit and create an even ‘cake’ at the top, then a “true light” to ensure a consistent burn.
Igniting the Pleasure: A Guide to Lighting Your Pipe
Smoking a pipe is not merely about inhaling smoke; it’s about savoring an experience. A crucial part of this experience, and one that can significantly affect your enjoyment, is lighting the pipe. As someone who’s fumbled with matches and endured the frustration of a pipe that won’t stay lit, I’m here to share my insights and guide you through the process of lighting your pipe.
The Right Tools for the Job
Before we start, let’s talk about the tools you’ll need. While there’s ongoing debate among pipe smokers about whether to use matches or a pipe lighter, I’ve found that both have their merits. Matches can provide more control, while a butane pipe lighter offers convenience and consistency. As a rule of thumb, avoid using petrol lighters as they can impart an unpleasant taste.
The Initial or “Charring” Light
The first step in lighting your pipe is known as the ‘charring light’ or ‘false light.’ Hold the flame just above the surface of the tobacco and puff gently while moving the flame in a circular motion around the entire surface of the tobacco. This process helps to create an evenly charred layer that will aid the ‘true light.’ During my early smoking days, I found that taking the time to establish a good charring light significantly improved my smoking experience.
The Tamp
After the charring light, take your pipe tamper and gently press down the charred tobacco. This action creates a flat, even surface that will help facilitate a consistent burn during the ‘true light.’ I discovered that a gentle touch is key here – press down too hard, and you may restrict the draw.
The ‘True’ Light
Now that you have an even, charred surface, it’s time for the ‘true light.’ This step is similar to the initial light – hold the flame just above the tobacco and puff while moving the flame around the surface. This light should take hold more quickly and easily due to the work done during the charring light and tamp. The aim is a nice, even ember that covers the entire surface of the tobacco. I quickly learned that an uneven light could lead to frequent relights or a bowl that burns down one side but not the other.
The Perfect Puff
Once your pipe is lit, the trick is to maintain a slow, even burn. This usually means gentle, regular puffs. As a beginner, I sometimes smoked too quickly, leading to a hot, harsh smoke. With time, I learned to slow down and savor the smoke, leading to a cooler, more flavorful experience.
Maintenance and Care: Ensuring a Long and Happy Life for Your Pipe
A good pipe, much like a fine watch or vintage car, is an investment. It requires care, maintenance, and sometimes a little TLC. As a passionate pipe smoker who’s learned some lessons the hard way, I’m here to share some crucial tips on maintenance and care that will help ensure a long and happy life for your cherished pipes.
Regular Cleaning
Just as you wouldn’t wear the same shirt for a week without washing it, you shouldn’t smoke your pipe without regular cleaning. A pipe cleaner should be run through the stem and shank of your pipe after each smoke to remove moisture and prevent a buildup of gunk. Early on, I neglected this step, leading to a noticeable decrease in the quality of my smoke. A quick clean after each use is a simple habit that can pay dividends in the long run.
Deep Cleaning
In addition to regular cleaning, a more thorough, deep clean should be done periodically, depending on how often you smoke. This process involves removing the stem and shank, cleaning with pipe sweetener or high-proof alcohol, and scrubbing the bowl with a pipe reamer or similar tool. My first deep clean was a revelation, drastically improving the flavor of my smokes.
Letting Your Pipe Rest
This might be the easiest (and hardest) part of pipe care. Allowing your pipe to rest for a period between smokes can significantly improve its lifespan and the quality of your smokes. The general rule is 24 hours, but more can be beneficial. It was a challenge to leave my favorite pipe untouched for days when I started, but investing in a rotation of pipes resolved the issue.
Proper Storage
Proper storage is another key aspect of pipe care. Pipes should be stored in a cool, dry place, ideally on a pipe stand or rack, which allows air to circulate around the pipe. I quickly discovered the perils of storing a pipe improperly when a beloved briar cracked after being left in a hot, stuffy room.
Avoiding Damage
Finally, it’s important to avoid causing damage to your pipe. This means not knocking out dottle on hard surfaces, not clenching the pipe too tightly in your teeth, and not subjecting the pipe to extreme temperatures. My first pipe, a handsome little corn cob, met an untimely end due to careless knocking out.
FAQ Pack a Tobacco Pipe
How do you properly pack a pipe to ensure a good smoke?
To properly pack a pipe, start by lightly filling the bowl with tobacco to the top, then gently press it down to about half the bowl’s depth. Repeat this process, gradually increasing the pressure with each layer, until the bowl is filled and the tobacco is compressed enough to allow air to flow but not too tight.
What is the importance of the rim in packing tobacco into the bowl of a pipe?
The rim of the bowl serves as a guide for how much tobacco to pack. It’s important to avoid overfilling past the rim, as this can cause uneven burning and difficulty in keeping the pipe lit.
Can you describe a method for packing loose tobacco in a new pipe?
A popular method for packing loose tobacco in a new pipe is the “step method.” Begin by lightly filling the bowl to the top, then gently tamp the tobacco down to about half the bowl. Add another layer of tobacco, press slightly firmer, and repeat until the bowl is filled and the tobacco is springy to the touch.
How should you tamp the tobacco during the packing process?
During packing, use a tamper tool to gently press the tobacco down after each layer. The pressure should be light at first and gradually increase with each layer, ensuring the air can still flow through the tobacco.
What is the correct way to pack tobacco into the pipe for experienced pipe smokers?
Experienced pipe smokers often use the “three-pinches method.” They fill the bowl with tobacco, tamp it down lightly, add more tobacco, tamp again with slightly more pressure, and repeat a third time, ensuring the tobacco is not too loose or too tight.
Is it necessary to run a pipe cleaner through the stem before or after packing the pipe?
It’s a good practice to run a pipe cleaner through the stem before packing to ensure the airway is clear. After smoking, running a pipe cleaner through can help remove moisture and residue.
How do you know if you’ve packed the right amount of tobacco into your pipe?
You know you’ve packed the right amount of tobacco when the top of the tobacco is level with the rim of the bowl, and it feels springy yet firm to the touch. Take a test draw; if the air flows freely without much resistance, your pipe is properly packed.
What are some common mistakes to avoid when packing your tobacco in the pipe bowl?
Common mistakes include packing the tobacco too loosely, which can cause the pipe to burn hot and fast, or too tightly, which makes it difficult to keep the pipe lit and can cause tongue bite.
Can you explain the difference in packing techniques for different tobacco blends?
Different tobacco blends, like loose cut or flake tobacco, require slightly varied packing techniques. Flake tobacco may need to be broken up more, while loose cut can be packed directly. The key is to adjust the pressure and amount based on the cut and moisture of the tobacco.
What should you do with leftover tobacco after filling your pipe?
Any leftover tobacco after filling your pipe can be stored for future use. Keep it in an airtight container to maintain its moisture and flavor, ensuring it’s ready for your next smoking session.
What is the best packing method for filling the bowl of a pipe with tobacco?
A common packing method is the three-step method. Start by filling the bowl loosely with tobacco to the top, then gently tamp it down. Repeat this process twice, increasing the pressure slightly each time, until the bowl is filled and the tobacco is firmly packed.
How do you ensure the tobacco in the bowl is evenly distributed at the bottom of the bowl?
To ensure even distribution at the bottom of the bowl, lightly shake the pipe or use a pipe nail to gently push the tobacco down, ensuring it’s evenly spread across the bottom of the bowl.
When preparing a smoking pipe, how much tobacco should be used?
The amount of tobacco used should be enough to fill the bowl of your pipe. Start with a pinch of tobacco and continue to add until the bowl is full, following your chosen packing technique.
How do you know when you have the right amount of tobacco in the bowl?
You’ll know you have the right amount of tobacco in the bowl when it reaches slightly below the rim of the bowl. The tobacco should still feel springy when pressed gently with your finger or a tamper.
What’s the correct way to put the pipe in your mouth and start smoking?
Place the pipe in your mouth at a comfortable angle, ensuring the bowl is upright. Light the tobacco evenly with a match or lighter, and draw gently to start smoking. Avoid clenching the pipe too hard with your teeth.
What is the importance of the method of packing tobacco in a pipe?
The method of packing tobacco in a pipe is crucial as it affects airflow and the quality of the smoke. Proper packing ensures an even burn and a smooth smoking experience.
Can you describe a smoking technique to keep the pipe going?
To keep the pipe going, take slow and steady puffs. Occasionally, gently tamp down the ash and unburnt tobacco in the bowl with a tamper or pipe nail to maintain airflow and encourage an even burn.
How should you pinch the loose tobacco when preparing it for smoking?
When pinching loose tobacco, use your fingertips to lightly pick up the tobacco and fill the bowl. Avoid compressing the tobacco too much as you fill, to ensure proper airflow.
How do you know if the pipe is free from obstructions before lighting it?
To ensure the pipe is free from obstructions, draw air through the pipe before lighting it. If the air flows freely without resistance, the pipe is clear. You can also visually inspect the bowl and run a pipe cleaner through the stem.
What should you do with the pipe once it’s been lit and smoked?
After the pipe has been lit and smoked, allow the pipe to cool down before disassembling it. Once cool, gently remove the ash and leftover tobacco from the bowl and clean the pipe thoroughly to ensure it’s ready for the next use.


